
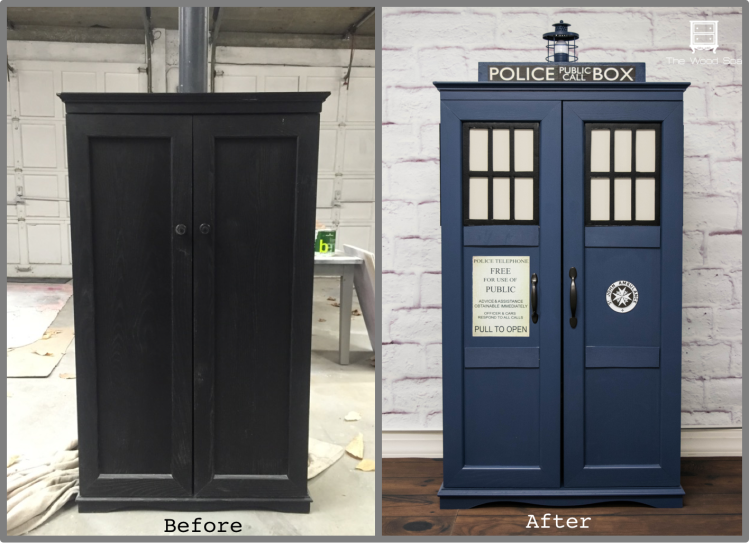
First of all I have to admit, this is NOT my idea. About a year ago I saw an amazing Tardis-bookcase on Pinterest and immediately fell in love with it. It was a sophisticated, near perfect replica made by a very, very skilled DIYer and most likely a hardcore Dr. Who fan.
I can’t say I’m a big fan of Dr. Who, but my husband is, so I watch some episodes every now and then. On the other hand, I am a hardcore fan of cool furniture transformations and was so impressed with that Tardis that I decided I had to try to make at least a simplified version of it.
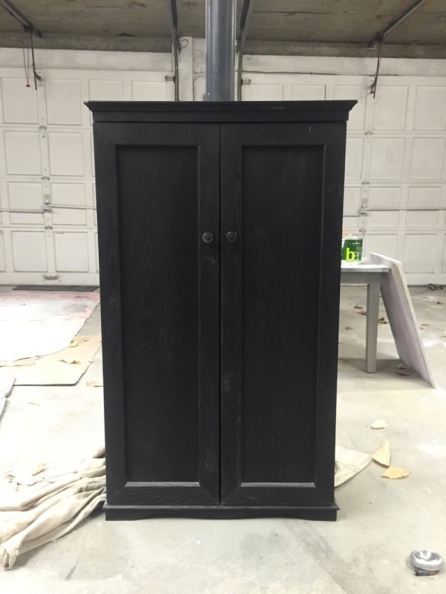
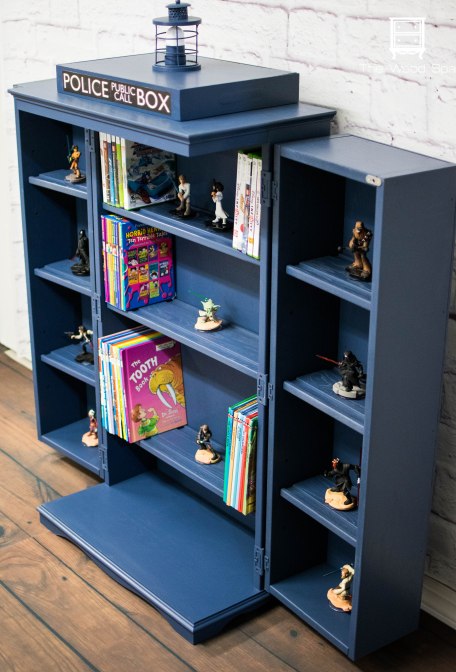
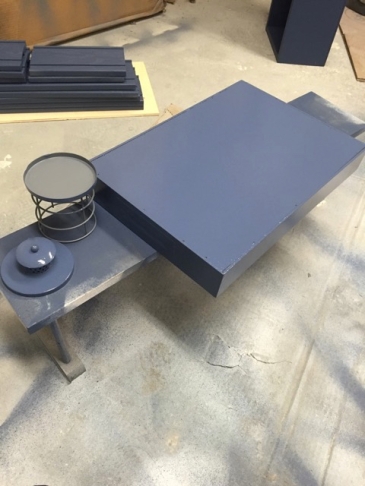
I kept an eye on Craigslist for cabinets that could work for this project and after several months, I finally found this one.
Due to my limited woodwork skills, this modified version was the closest I could get to the original, and I am pretty happy with the result.

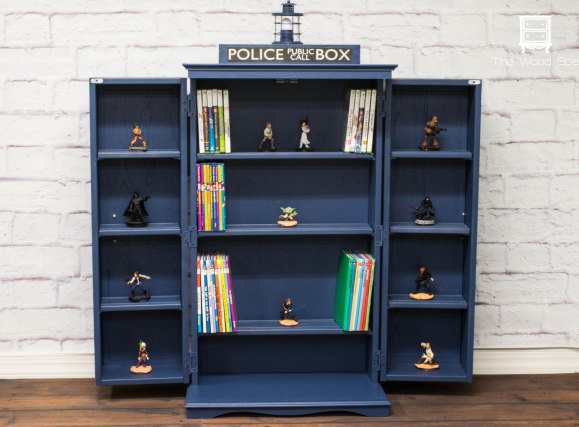
My favorite part… This cutie is bigger on the inside! (Some say it can even time travel!)
Tutorial – How I made this Mini-Tardis
Material
- Black foamboard
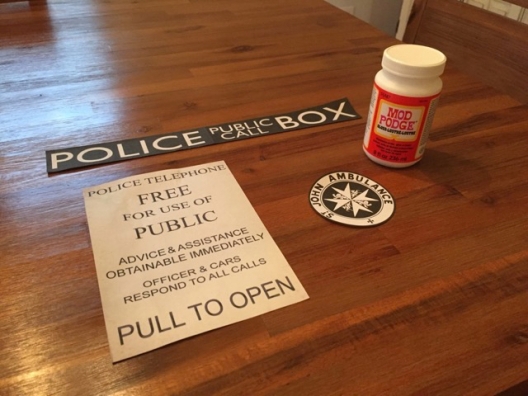
- Printed signs (from the Internet)
- Mod Podge (for decoupage)
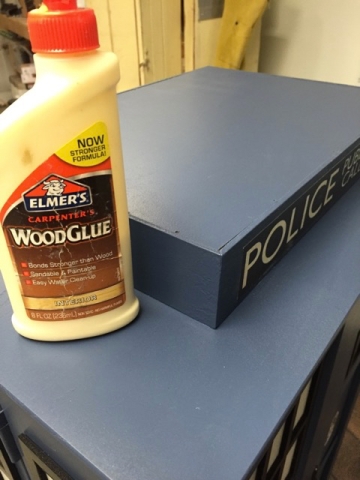
- Wood glue
- Wood tray (or something with similar shape)
- Small pieces of plywood (from craft store)
- Small candle holder (or something similar for top light)
- Cylinder shape pocket flashlight
- Gray Primer (I used Rustoleum gray primer spray)
- Blue latex paint (I used Valspar Indigo Streamer)
- Light gray latex paint (for windows)
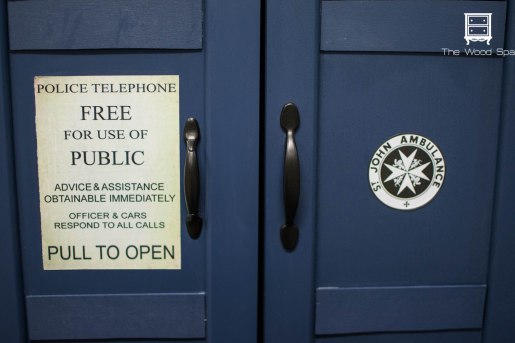
- Bar pulls in two different sizes
- Paint sprayer OR foam rollers and paint brush
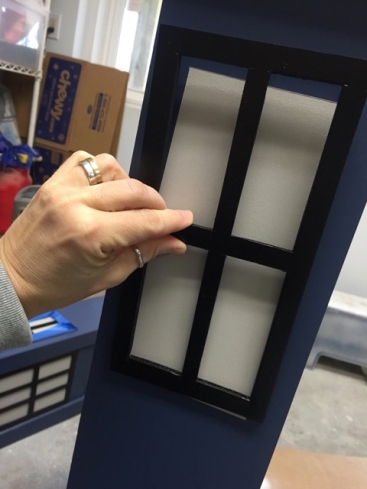
Part 1 – Window frames, Top, and Light.
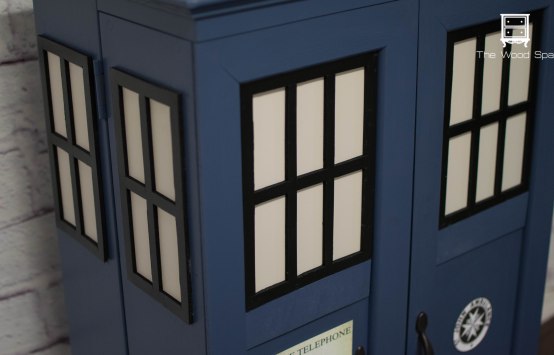
First I worked out what would be a proportional size for the windows. I decided to divide each front door in 3 equal parts from top to bottom. The window frames went on the top section of the front door and on the sides. For this cabinet, the side windows needed to be narrower than the front ones in order to fit each of the 2 sections separated by the door hinges.
I drew all window frames on the black foamboard and cut them out using a snap-off knife.
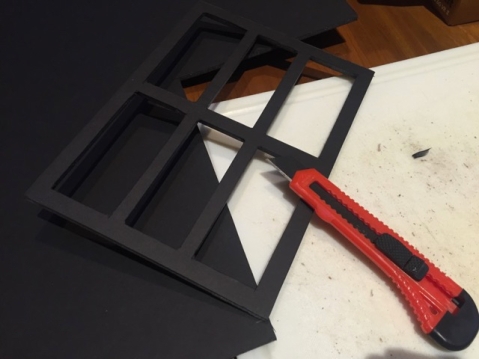
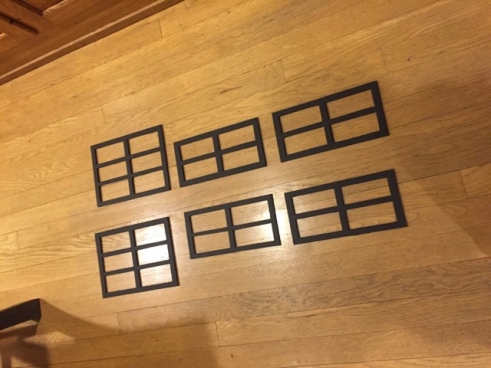
Here are all the window frames ready.
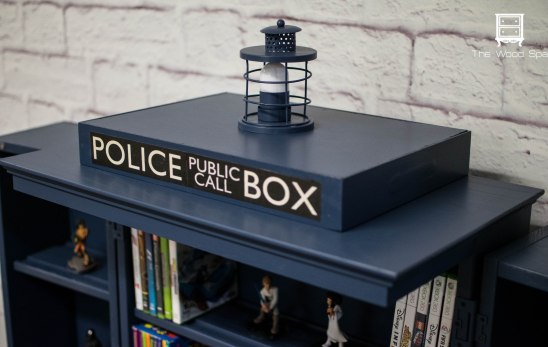
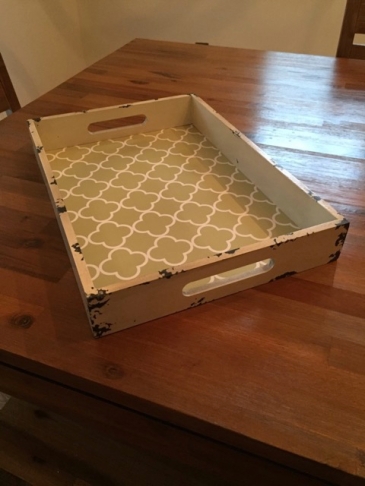
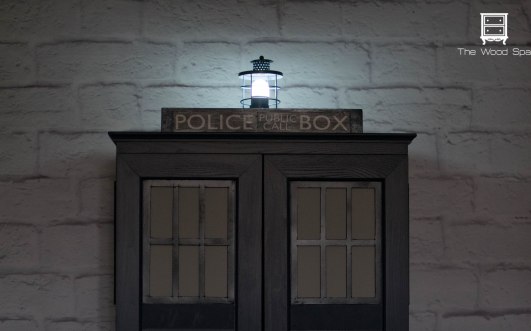
For the “box” above the cabinet, I found a rectangular wood tray at Michaels, and used the same black foamboard to fill in the handles and make a smooth surface on all four sides.
The little metal frame on the top light was a candle lantern I bought from this online store.
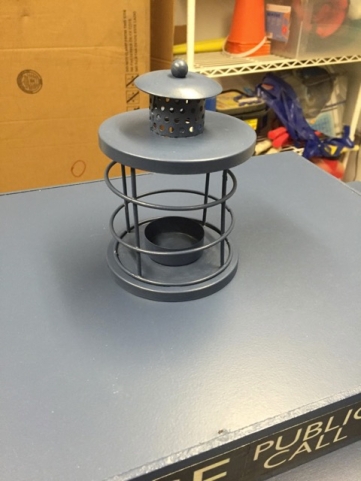
The light inside the candle lantern is a cheap pocket flashlight I found at Lowes.

I painted all pieces in the same blue paint as the cabinet (Valspar Indigo Streamer).
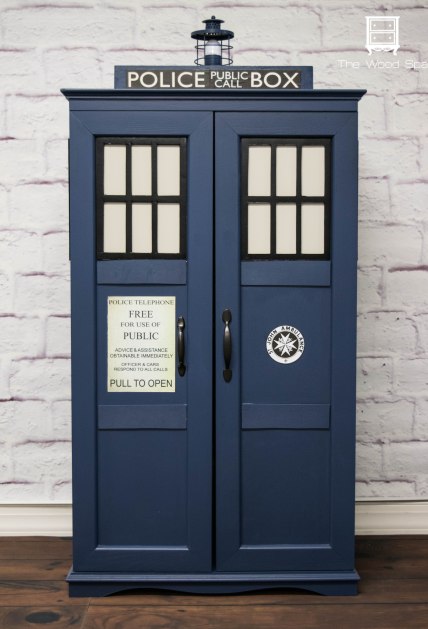
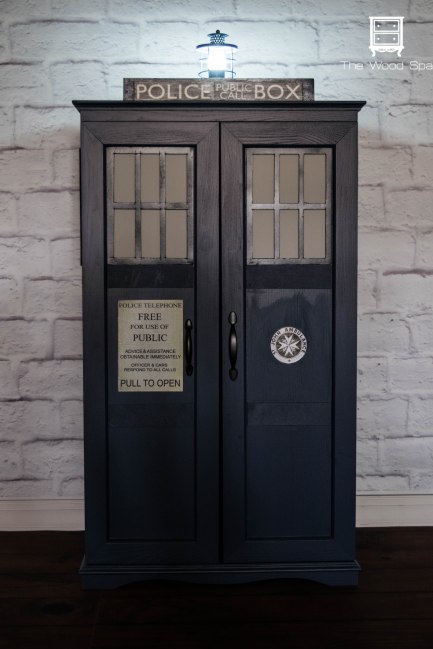
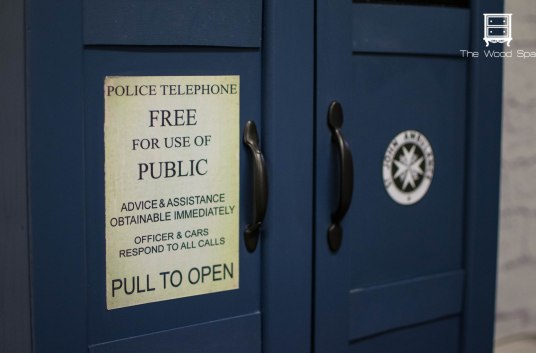
All signs you see on the doors and top were printed out of the Internet. Just google them and you’ll find dozens of options in all different sizes.
I used decoupage to apply them to the cabinet AFTER the paint was dry.
In this cabinet, the front doors didn’t have the same panels the original Tardis has, so I cut and painted some pieces of plywood, and glued them to the doors to make three equal sections.

Part 2. The cabinet
First I took the whole thing apart – knobs, hinges, and shelves.
Closed the original knob holes with wood filler.
Cleaned and cleaned again with TSP diluted in water.
Primed all pieces using Rustoleum gray primer spray.

To save time, I spray painted the entire cabinet, shelves and hinges with Valspar Indigo Streamer. You could also use foam rollers and high quality brushes to do this part.
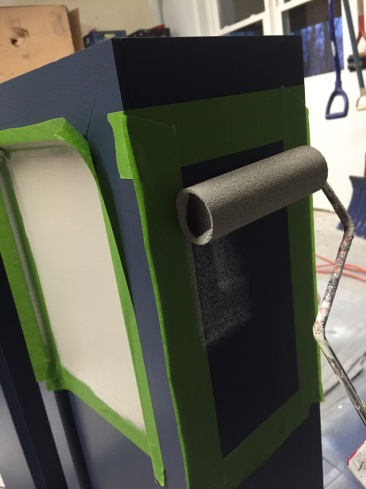
I drew and painted the window “glass” in light gray, using Frog tape to keep the light color inside the lines, and a sponge roller to obtain a smooth surface.
After all was painted and dry, I glued the window frames to the doors and sides, and the tray (upside down) to the top of the cabinet.
Before putting the cabinet together, I drilled the holes for the new handles and installed them (notice they go in different places!)
Finally, the cherry on top: the light!
I hope this tutorial was helpful. If you’re going to try, don’t hesitate to ask me any questions. I’m usually pretty quick to reply.
Thanks for reading!
Love,
Patricia.

This is great. I’m not a Dr. Who fan but I really love how you transformed this into a unique useful piece. You did a terrific job. I saw your link at Angie’s Knick of Time/Talk of the Town party.
LikeLike
Thanks for your kind words 🙂
LikeLike
This is crazy gooooood!! You did an amazing job! How creative! Soooooo cool! I hope you have a great day!
Smiles!
Terry
LikeLike
Thank you Terry! I had a lot of fun doing it, and I’m glad you enjoy it as much as I do. Have a great day!
LikeLike
I absolutely adore this – so clever and such a great transformation! I shared it on my blog today – here’s a link – http://www.evolutionofstyleblog.com/2016/03/friday-51-5-things-love-1-thing-dont-3-4-16.html. Great job!!
LikeLike
Thanks!
LikeLike
Visiting from the Making Broken Beautiful link party. This is the cutest makeover I’ve seen in a long time. Adorable! – Vicki @ EntriWays
LikeLike
Thank you Vicki!
LikeLike
This turned out fabulous. You have a wonderful imagination to come up with this.
LikeLike
Thanks Debra! Not my idea, but I’ll take your compliment. It was a lot of work, but super fun!
LikeLike
This is awesome!
LikeLike
Thanks! 🙂
LikeLike
AMAZING!!! 😉
LOVE this, thank you for sharing!
LikeLiked by 1 person
Thanks!!
LikeLike
So great! You did such an amazing job on this. Visiting form Talk of the Town part.
LikeLike
Thanks a lot!
LikeLike
I am a huge fan of the Doctor and you have got me drooling over this. Maybe one day…pinning! You did an amazing job! Now if only you could fix the show! 😉
LikeLike
Thanks Mary, yes, when I first saw it on Pinterest it felt intimidating, but I promise you my version is much easier, so go for it! As per the show, I’m sure some good Whovian will resuscitate it!
LikeLiked by 1 person
My son and I are huge Dr. Who fans ( watched some of the original shows when they aired in the 80’s on our PBS station) and I LOVE this!! Great job! I am sure that my son wishes he had one ( he is 34 years old by the way!)
Hugs,Deb
LikeLike
Thanks Debbie! Actually, the big fan here at home is the grownup (my husband). My kids get scared with Dr. Who shows so they didn’t want the Tardis in their bedroom. Go figure…
LikeLike
This is all sorts of wonderful! I’m a huge Dr Who fan and want one of these. I’ve seen the other one on Pinterest and it seemed to complex, but I think I can do this. The good thing is that my hubby loves Dr Who also, so I can have him help me with this for our room.
LikeLike
Did you see the big one? It’s intimidating! I’m glad you can do it AND with a helper! I hope you share it.
LikeLike
What a great vision you had for this piece and a creative use of materials. You did an amazing job! Would love to have you share it on Friday’s Furniture Fix! http://www.patinaparadise.com/2016/03/fridays-furniture-fix-30_11.html Every weekend from Friday morning to Sunday night.
LikeLike
Thank you so much, Lucy! I thought I had shared it on FFF. Will do it now!
LikeLike
So I am a huuuuge Dr. Who fan and think this is amazing! And yes, it is bigger on the inside 🙂 Fantastic job 🙂 Thanks so much for linking up to #FridaysFurnitureFix
LikeLike
Thank you,and thanks for hosting the party! I love when I hear a compliment from a real fan. It means a lot 🙂
LikeLike
Love it!
LikeLiked by 1 person
Thanks Sandra!
LikeLike
This is AMAZING! I can never let my boys see it or they will want one. Great job.
LikeLike
You should give it a shot! You’ll be the mom of the year!!
🙂
LikeLike
So awesome! I especially love the light on the top. I made the door of our media room into a TARDIS door, but couldn’t figure out how to put a light on it. I would love to build a bookcase as well, but might not be such a good idea in that room. Crazy timey-wimey things might happen! 🙂
LikeLike
Haha, funny!
Do it army your own risk! strange things can happen…
😀
LikeLike
Patricia, just wanted to let you know that your Tardis cabinet was my pick for this week’s Friday;s Furniture Fix Party. Now back to opening on Thursday nights at 9PM EST. Have a great weekend! http://www.patinaparadise.com/2016/03/fridays-furniture-fix-31.html
LikeLiked by 1 person
Yay! Thank you so much Lucy! I love this week’s featured pieces. Such an honor to be among them again 🙂
Have s great weekend too.
Patricia.
LikeLike
Love this, my 17 year old daughter wants one now. : )
I assume the cabinet you started with already was built to open like that. Hinges on the side and shelves on the door, yes? All wardrobes/cabinets I have seen have the usual openings of just doors opening into deep shelves. If you redesigned the cabinet, I would LOVE that tutorial! Here’s hoping!
LikeLiked by 1 person
Casey, I found this cabinet on Craigslist and it was already built like that. I wish I had the skills to make one myself, but I’m not a woodworker. If you are willing to invest in one for your daughter, Walmart sells them (check link below). If you decide to do and have any question, you know where to find me!
http://www.walmart.com/ip/20645797?wmlspartner=wlpa&adid=22222222227014962968&wl0=&wl1=g&wl2=c&wl3=40846017032&wl4=&wl5=pla&wl6=78659104592&veh=sem
LikeLike
That was just the right information I needed! A “media storage cabinet”. Now I know what to hunt down on my local facebook resale page. Thank you.
LikeLike
My grandson is a huge fan! His birthday is coming up – thanks for the inspiration!
LikeLiked by 1 person
Oh, he will be a very happy grandson this birthday. Let me know if you have any question during the process. Good luck!
LikeLike
Wow, this is amazing. the cabinet is gorgeous although I don’t believe the part that it can time travel. If I want to build something like this, would it take me less than a week (for a complete beginner)?
LikeLike
Thank you Charlice! I wish I could time travel in it!
I didn’t build this one from scratch, I just painted and added the items you saw on the post. It took me about 12-14 hours as far as I remember. I finished it in three days. Find the right cabinet on craigslist or thrift store, follow my instructions and you’ll have your own Tardis!! Good luck!
LikeLike