
I’ve been painting furniture for a couple of years now, and sometimes I feel I should have found my own favorite style, or at least one I am “better at”. My specialty. So far I can’t say I found that, and I wonder if ever will (do I need to?)
I love to try and explore all paints, finishes and techniques. I see beauty in each one. For my house, I like rustic, farmhouse, and a little bit of industrial. If you know who Joanna Gaines is, it is easy to understand what I mean. I love every single thing that woman does.
On the other hand, when it comes to painting, I don’t have a favorite.
I don’t own any French Provincial or Mid Century Modern pieces, but I absolutely love painting them. I find those gigantic Jacobean buffets breathtaking, and can’t wait to paint the one I bought for a steal on Craigslist, but again, I would not keep it.
I love shabby chic, rustic, weathered, coastal, high-gloss and metallic finishes… I want to do all of them, if possible in the same week, so I don’t get bored.
Most of my work so far has been custom orders, so I don’t get to choose what to do. My customers tell me what they want, and off I go play with my messy toys.
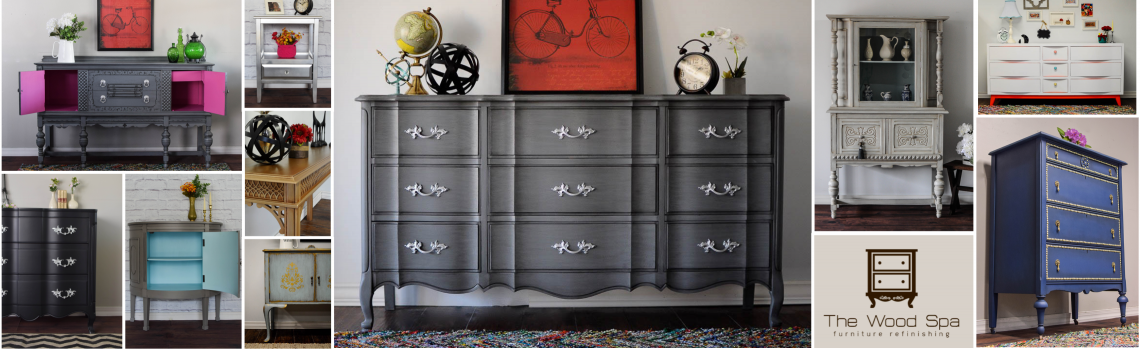
With this cute hutch or china cabinet (not sure what is the proper name) I could finally experience the delicious freedom of choice. My sons’ school will have its annual silent auction, and I offered them a refinished piece as one of the items for the action. I got to choose everything! The piece, the colors, the finish, the techniques… It felt sooo liberating!

I follow several wonderful blogs and social media pages from people in this business, and one technique I am obsessed about is layering. The fascinating texture and depth of two or more colors mixed in a rustic finish is just irresistibly beautiful.
This is the third time I get to try it, and although it is not exactly the look I was envisioning before I started, I am pretty happy with the result.


How I did it:
1 – Primed the whole piece with Rustoleum white primer spray.
2 – One coat of homemade chalk paint of Ben Moore Harbor Haze (pale blue)
3 – One coat of Valspar Sculpting clay (light gray)
4 – Heavy sanding (80 grit) so the blue would show throug in some areas
5 – Light distress on all edges so the original wood shows through
5 – Dry brush with white paint
6 – Dark wax on the edges


It took me almost 5 days to finish, not including the forced break during the insane low temperatures of last week.
Let me know what you think.


Love,
Patricia.

Well, patricia, If these pictures are any indication, I’d say that you are a pro at layering. This piece is gorgeous! I wish I could beat that silent auction. Anyway, you did a spectacular job! I came over from the furniture fix it link party.
LikeLiked by 1 person
Thanks for your kind words Vanessa! There is still a lot to learn until I get closer to my “inspiration” pieces.
LikeLike
This is so lovely! I’m so intrigued with the Valspar sculpting clay. I really must try it! Thanks so much so linking to Friday’s Furniture Fix. ….Susie
LikeLiked by 1 person
Thanks Susie! Sculpting clay is just the color name. It’s a really nice light gray.
I use it a lot!
LikeLike
Patricia, you hit this one out of the ballpark. love it. have to try it sometime, so thanks for all the info you provided. I’m your newest fan.
LikeLike
Thanks for your kind words Sharon!
LikeLike
Beautiful job on your china cabinet! Would have placed a silent bid! Thanks for sharing.
LikeLike
Thank you!
LikeLike
Oh my, so happy to see my cabinet was picked for this edition! I love everything I see on your link parties!
LikeLike
What a breathtaking piece with all it’s gorgeous details! That’s all I can say! Well Done! It’s beautiful!
Smiles!
Terry
http://thecuratorscollection.wordpress.com
Making Broken Beautiful
LikeLiked by 1 person
I am just about to start refurbishing furnitures, although it was one of my ‘dreams’ for quite a few years. I like your work very much and appreciate all the detailed information you share. One thing I would like to ask is, do you always use solid wood furnitures, or are some of them made of something else (like plywood, etc). Because since the ’60s plywood and even chipboard came into the scene and many of the furnitures from those times are not made of solid wood (although they look like). Do you have experience with them? As for me, I wish to exlude all the not-real-wood ones, but I don’t know yet what answer to give to a client who comes to me with such a piece.
Thank you for your advice!
LikeLike
Hi Adrienn, thanks a lot for your kind words! I do have experience with pieces that are not solid wood. You can definitely paint them. I don’t stain them because you can’t sand them down.
Steps are: clean it well with water-vinegar mix, lightly sand it OR if it is in good condition, wipe it with deglosser. Then clean it again to remove the deglosser. Apply a coat of primer, then paint. Check out my post https://thewoodspa.com/2016/05/06/fire/ to see an example.
I suggest that you start it on cheap/small pieces first before moving to large ones. Good luck on your projects!
LikeLike
Your work is breathtaking!
LikeLike
Thank you! You’re very kind to say that 🙂
LikeLiked by 1 person
Your work is breathtaking!
LikeLiked by 1 person
what kind of sealer do you use before applying the dark wax
LikeLike
Hi Terry, I sealed this one with clear wax. If the piece will have more handling, I seal it with water-based poly.
LikeLike
hi pat I am new to refinishing and I am going to attempt to do a antique dresser and in some places the paint is peeling and I sanded these areas and now there are some uneven areas where the paint is still good and where I sanded would you prime the whole piece before chalk painting and what primer do you use as your pieces are spectacular
LikeLike
Terry,
It seems the piece you’ll paint has already been painted, is that right? Preparation is essential for a good final result, so if the previous paint is pealing and the surface is uneven you will probably need to strip the paint completely or sand it down in order to have a smooth surface to receive the new paint.
A primer would be enough if the previous finish was in good condition (not pealing or uneven). Also, for most branded (not homemade) chalk paints, you don’t even need to prime. Just some light sanding a good cleaning would be enough for the new coats of chalk paint to adhere.
I hope this helps. Let me know if you have more questions.
Patricia.
LikeLike
hi pat upon closer inspecting I noticed that the dresser is wood with venner on some of it will it be ok to strip the whole piece and if I should do this what do u
you use and the ones I have seen state to wash the piece with water but doesn’t that make the venner warp when it dries and can it then be sanded help!!!! please and thank you
LikeLike
Hi Terry,
Use a spray bottle with soapy water to wash it. Wipe and dry it well, avoiding leaving the wood soaking with water for too long. It won’t warp. You can sand it after it’s clean and dry.
If it only veneer, use finer grit sandpapers (120+), to avoid damaging the veneer.
Good luck!
LikeLike
Absolutely beautiful!
LikeLike
Thanks Susan!
LikeLike
Absolutely stunning
LikeLike
Thanks Jenny!
LikeLike
I love this! Been looking for inspiration for a desk I bought used and will be trying to replicate your beautiful piece. Wondering how you would recommend protecting the top of the desk from wear. Thanks in advance 😊
LikeLike
Thanks Gina!
To protect the top, apply at least 3 coats of water based poly. My favorites are Varathane snd General Finishes. I like the satin sheen.
Good luck in your project!
LikeLike